Submitted by James Klim DDS, CADStar host on 03/01/2020 - 10:43am

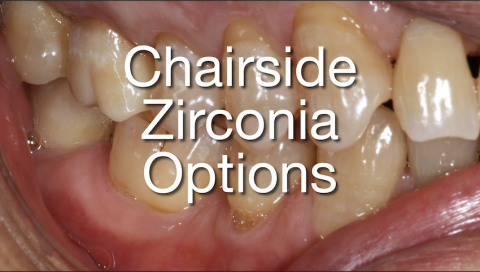
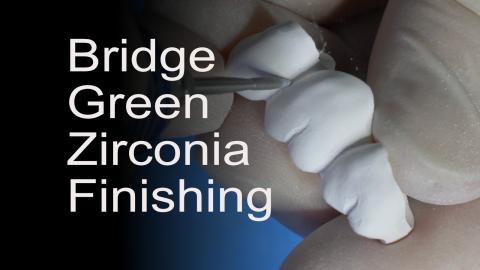
Part 2 for creating a posterior ZirCAD multi Bridge.  Once the bridged is machined, what are the steps to effectively shape and finish the bridge before sintering? I follow a routine shaping workflow using the Meisinger JK04 Zirconia Lab Kit. Quite often, when using the multi zirconia options such as Katana or ZirCAD Multi, I will use selective infiltration to control value and enhance the multi-effect when the case demands a better blend.  

  • Meisinger JK04 Zirconia Lab Kit
  • ZirCAD LT Coloring Liquids (Ivoclar)

Submitted by James Klim DDS, CADStar host on 02/28/2020 - 1:18pm

Categories:

Now that the CAD/CAM office has a growing selection of aesthetic zirconia options such as 3M, Katana STML, ZirCAD Multi, and the soon to be released ZirCAD Prime, what furnace is needed to fire these incredible zirconia options?

Submitted by James Klim DDS, CADStar host on 02/20/2020 - 2:11pm

Zirconia brand options in the CAD/CAM world are multiplying as we speak.  Fortunately, this surge in material options provides a better creative menu to choose from when setting up our CEREC software for a bridge.  We have e.max for anterior, zirconia multi-options for the premolar zone, and high strength zirconia when we still need the muscle material.  We need to be familiar with the 3Y, 4Y, and 5Y zirconia selections, it will impact our prep style, reduction, aesthetics, and strength.  Not all zirconia options have the same biofunctional strength. This video will provide an overview of zirconia bridge materials and the setup process in

Submitted by James Klim DDS, CADStar host on 02/09/2020 - 8:55pm

This video documents my current steps for cementing an implant abutment or one-piece implant restoration on the TiBase.  The protocol that I have changed as of late is using Monobond Etch & Prime rather than hydrofluoric acid and silane.  I have experienced great success with my TiBase created implant restorations.  I have yet to see an e.max or zirconia abutment delaminated from the TiBase in 8 years.

Cementation Steps:

  1. Sandblast the adhesive surface on the TiBase
  2. MonoBond Plus metal priming on TiBase
  3. Fill access screw tube with plumbers tape
  4. MonoBond Etch & Prime internal adhesive 

Submitted by James Klim DDS, CADStar host on 02/06/2020 - 9:30pm

One asset of the Primescan imaging capability is the 20 mm scan depth.  That came in handy today in my Primescan clinical theater by scanning, designing and fabricating a custom zirconia post.  This #cereccasereview will document my software and restorative workflow.

Submitted by James Klim DDS, CADStar host on 01/21/2020 - 9:11pm

This video will highlight my anterior ceramic shaping workflow for multiple anterior restorations, particularly when crossing the midline.  However, anterior restorative success is mostly about understanding the patient's treatment expectations and then working through the biomechanical diagnosis and preplanning with either a traditional or digital wax-up.  

The predetermined wax-up prototype is used for preparation guidelines and reduction, transitional restorations when using a two appointment protocol, and a digital BioCopy scan for digital design guidance.  When these preliminary and preparatory guidelines are delivered to the

Submitted by James Klim DDS, CADStar host on 01/13/2020 - 9:46pm

2020 will be a year of growth and excitement at the Klim Institute online CEREC training.  We have an evolving software and will see several new applications that will provide a full range of care options for our patients.  As exciting...new materials entering our CAD/CAM market this year.  

I am most impressed with MiYO, a liquid ceramic that is painted on our ceramics like a stain and glaze.  The results are magical.  This will bring our chairside aesthetics applications to a whole new level not yet experienced in our industry.

The Klim Institute Online will be adding two new channels this year... Full Mouth with CEREC and

Submitted by James Klim DDS, CADStar host on 12/16/2019 - 8:34pm

For posterior e.max restorations, spray glaze is one of the most effective ways to achieve an excellent luster finish. This video will walk through my spray glaze application technique for posterior e.max.  For anterior teeth, I tend to apply brush-on glaze for more micro-surface texture control.

Make sure your whole team views this video, it is excellent for training and standardizing the e.max finishing workflow.

Submitted by James Klim DDS, CADStar host on 12/15/2019 - 3:01pm

Brush-on IPS Crystall glaze tutorial for all e.max glaze firing cycles and avoid glaze bubbling and surface glaze firing pits.  This is precisely the posterior e.max glaze/stain technique I use in my clinical theater.

 Make sure your whole team views this video, it is excellent for training and standardizing the e.max finishing workflow.

Submitted by James Klim DDS, CADStar host on 12/13/2019 - 12:55pm

This tutorial is the first part of the stain & glaze trilogy series for the Ivoclar rapid e.max firing cycle (and it works for all the e.max firing cycles).  Once the restoration is milled, the e.max posterior restoration is efficiently shaped for morphological refinement, surface texture, and surface finish using the Dr. James Klim Meisinger JK03 Lab bur kit specially designed for CEREC users. 

This video will show the burs and polishing workflow I use preparing e.max for either brush-on or spray glaze  Make sure your whole team views this video, it is excellent for training and standardizing the e.max finishing workflow.