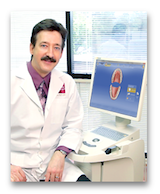
Clinical CEREC time efficiency is benchmarked when the optical impression is taken during the appointment and systemizing the finishing steps . I stage the appointment to the following Case Planning Factors.
1. Material to be used
2. Location in the mouth
3. Upper or lower arch
4. Anesthetic demands
5. Subgingival conditions for margin placement
6. The patient temperament
CEREC Clinical Sequence Events
- Anesthesia
- Opposing arch scan
- BioCopy scan if needed for BioCopy proposing technique
- Buccal scan (UNLESS…in cases of a lower mandibular block, the buccal scan is taken before anesthesia to assure condyles are fully seated for the buccal scan)
- Preparation(s)
- Soft tissue retraction ( I prefer laser for posterior)
- Preparation optical impression ( this is the significant “staying on time” part of managing the CEREC clinical procedure). Optical impression predictability is enhanced following the preparation principles as conveyed in CEREC Liftoff series and using recommended tongue, lip, and cheek retraction protocols. With CEREC 4.0, we can now pitch and roll the camera to gain undercut/emergence information and still see excellent fits. Best benefit of CEREC 4.0!!!!!!!!!!! 3.85 works best if the optical camera is NOT pitched and rolled.
- Quality and speed of virtual design is significantly impacted by preparation insertion alignment with the adjacent proximal contacts. Avoid over using the design tools.
- Posterior Design Mode…Biogeneric
- Multiple Anterior…BioCopy/Correlation (preplanning the case with a wax-up is my time saving factor in these cases)
- Single anterior…BioReference
- Post-mill restoration finishing. Setup easy lab access for… straight handpiece, burs, polishers, stain and glaze support supplies as needed. Make finishing a systematic repeatable exercise, same steps every time...facilitates time efficiency and predictability. Understand that e.max will take more processing time and schedule accordingly. How much finishing will be delegated to the team?
- Make seating steps routine. While ceramic is in oven, Expasyl (Kerr) or Traxodent (Premier) is placed for tissue conditioning. Following ceramic retrieval from oven, I will go through try-in verification of glazed ceramic, isolation with Isolite or rubber dam, ceramic preparation protocols applied, tooth adhesive applications, cement placement and insertion, curing/cleanup, occlusal check and polish. The time efficiency of this appointment is impacted by proper soft tissue management (no bleeding) and mastering the occlusal acquisition and parameters to provide shimstock occlusal outcome. BIG time savings.
- Post treatment x-ray… be certain all cement is removed.
Master each step of the clinical sequencing process and make it a system. Customized appointment time for nature of Case Planning Factors.
Most of our CEREC restorative outcomes and clinical timing success results from preparation, soft tissue retraction, and digital impression technique. Now that 4.0 provides capturing angulation variables, the optical impression has significantly been simplified.
